


Top 25 Things to Do with Beer Caps
of reading
What can you do with beer caps? If you have imagination, the ideas are limitless. ! I've selected the top 25 ideas for what you can do with beer caps.
These are DIY suggestions, meaning Do It Yourself (Do It Yourself for Dummies in English! 😅). Welcome to beer cap decorating. It's high time to heat up your bottle opener because you're going to need a lot of raw materials!
In the spirit of recycling, I therefore suggest that you recycle capsules and give you decorative ideas to make with your little hands. Likewise, I will offer you as much as possible the solution of recovering objects , with the aim of recycling your waste . So it's beer capsule recycling !
Before you can jump into these tutorials, you should know that beer cap collectors are cervacapsulophiles and their practice is cervacapsulophilia ! That's some general knowledge!
All these decorating tutorials will allow you to create inexpensive home decor . It's all about giving you home decor ideas . Yes, it's also an interior design blog ! So empty or fill your beer mug (your choice) and let's go!
Decorative Flower Capsules

Making flowers from beer caps? Yes, it's possible! You'll need beer caps and a can lid. It's a great upcycling project , right?
Simply fold and crush your bottle caps to make the petals, then attach them all to your lid. However, please remember to clean the lid of your ravioli box thoroughly, otherwise it's a bit mediocre! I recommend using different colored caps to create a truly unique flower.
Otherwise, it is also possible to do the opposite: combine all those of the same brand or similar colors to give it a more uniform look.
For those who don't feel like a DIY enthusiast, we offer another option: challenge your friends to throw bottle caps at a magnetic target ! This solution has the advantage of being fun and bringing everyone together, you'll quickly see for yourself! 😆 Here is our magnetic target for beer caps :

Just click on the photo to see it!
Giant Capsule Letters

You'll need to start by making your support . You'll have the choice between cutting polystyrene, cardboard or even wood if you're well equipped (no pun intended, of course).
I prefer polystyrene or cardboard because you can push the capsules into it. This has the advantage of having a relatively smooth assembly and the capsules hold better.
You can leave it raw or paint it, the choice is yours. If you're really motivated, you can even try making several letters to write a word, a first name, or even a sentence .
Oh dear, I might need more caps... But how am I going to get some lol? You'll have to heat up your wall-mounted bottle opener ! 😜
Once your support(s) are made, you just need to glue them and twist those on the edges.
Represent a country or region with capsules

We generally love where we live . How about using your old capsules to represent your region, your country, or even make a capsule world map if you're feeling really motivated?
You have to be a little chauvinistic from time to time and not hesitate to show it. It can also be a nice gift idea, in the mode you saw, I made it! It's the perfect decorative wall beer cap .
I recommend you salvage old planks or parquet scraps to make your support. It's trendy to salvage pallets , so if you have the opportunity to pick one up somewhere, it will be ideal. It's a fairly light wood, and depending on the shade you salvage it in, you can choose whether or not to paint the planks.
Here again, you'll need strong glue. This will give you a stunning beer cap painting !
Vintage Capsules Mirror

In this case, it's mainly a matter of customizing the frame of an existing mirror . Another solution is also possible: buy a mirror and glue it onto a square, rectangular, or oval frame. This way, you can choose the surface you want to cover with beer caps.
The result is really nice and from experience I recommend you place this mirror in your entryway. It's always handy to take a last look at yourself before leaving the house and check that you don't have a lettuce leaf between your teeth or a terrible haircut!
This location also offers the advantage of receiving many compliments when you welcome friends or family into your home! 😉
As with the flower, you will have the choice of giving a uniform or patchwork effect depending on the color or brand of capsules you use.
To make the frame for this mirror, you'll need a bunch of bottle caps! To make it look prettier, I recommend using a variety of different ones, unless you want to create a pattern. If you're a beer fan and want to have so many different bottle caps , you'll definitely love our poster of different types of beer ! Here's our best-selling product across all categories:

It brings together all the different beer families and their many derivatives. A must for all beer lovers, trust me! Click on the image and you'll go straight to it! 😉
Capsule Checkers Game

Now, don't complain that it's complicated to make! Taking an existing checkers set and replacing the pieces with capsules is downright easy!
If you have the soul of a carpenter or cabinetmaker, you can always make your own wooden board. On the other hand, if you have these talents, it would seem logical that you would want to make your own wooden pawns! For ordinary mortals, there are other solutions:
- Buy scraps of checkered fabric (as pictured)
- Paint or draw on a support such as cardboard or very thin wood
- Recycle an old oilcloth from grandma or those good old checkered napkins that our elders loved. You know what we're talking about, right?! 😆
Capsule Wind Chimes

This time, if you're not equipped, it's going to take you a while to complete, but you should be rewarded with the result. You'll need:
- a large chain with flexible links
- fine pliers to be able to twist, detach and reattach the links.
- a punch to pierce the holes in the capsules. It is also possible to pierce them with a drill with a bit for metal, if possible with a vice so that the capsule does not move. I really recommend the punch which will save you a lot of time and frustration because wedging a capsule in a vice, just right so that it does not move and without crushing it... it's not fun!
- a support that will serve as a base for the capsule chains. A pierced lid that you can use in the kitchen to cover your pans can work very well
- capsules obviously!
Reading what you need should have already helped you understand what to do. Buy or recover one or more chains depending on the size you want your chime to be. You can also get chains either at a hardware store (but they will likely be too big) or from websites that offer DIY jewelry.
Depending on the hanging bracket you choose, you may need to make holes in it to allow for more chains. The holes should be close together, but not too close together, so that the capsules can move, rotate minimally, and, above all, clink against each other.
Start by taking four pieces of chain of equal length, which you will use to hang your stand, and then attach them to it. Detach several links, which you will use to connect the capsules. Drill holes in the top and bottom of the capsules to hang them vertically. Attach the small pieces of links to hold them together.
Repeat the process identically for each chain. Make sure the capsules on each chain are level, otherwise they won't jingle! 😅
If you want to start collecting bottle caps, a bottle opener with a basket can be a great start! Here's one of the many we offer:

Just click on the image to take a look. 😉
Capsule Coasters or Coasters

2 options for these coasters:
- As in the photo, you need to cut circles from a cork board so that you can glue a cap onto each “disc.” Make sure your discs are larger than your caps, otherwise they will scratch your table. We recommend using a glue gun to do this because you will then need to connect the discs together to create a surface large enough to hold a glass. The glue from this type of gun is perfect for this. You buy it in stick form.
- If you want to make it easier, you can cut a mug-sized disc directly from your cork board and stick your capsules on it.
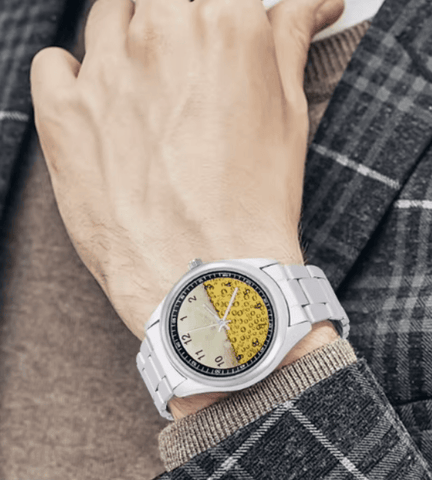
Capsule Clock

To make this clock, you'll need to get a small case with hands, unless you can find some somewhere. You can find them for less than €1 on Amazon by searching for clock hands and case . When choosing your support, be careful not to choose one that's too thick. This type of case is designed for thin dials.
Drill a hole in the center of your base. For a square dial, a compass is perfect. Otherwise, plant a nail in the hole, attach a string to it, and attach a pencil to the other side to draw a perfect circle. This will serve as a guide to mark the positions of the full hours.
All you have to do is glue the capsules of your choice for the 12 hours of a dial. Finally, place the case straight, putting a little glue on the part in contact with the support. All you have to do is put the hands back on and you're done!
Oh yes, by the way, we didn't mention it, but remember to buy a battery for your clock! 😁
It 's going to be difficult for you to find a giant bottle cap, so we've got you covered! Here's one of our beer cap clocks (click on it to see it):

Making Costume Jewelry Capsules

You can choose to make bracelets, necklaces, rings, and even earrings! You're sure to know some little girls (or even older ones, right! 😉) who will love them.
Here are several examples:
Necklaces
Choose a necklace you like, such as a ribbon or a chain. For the capsules, you can choose to decorate the inside (with shells, small colored pebbles, etc.) or photos, or paint it (see photos).
Once your caps are ready, all you have to do is attach them together using the same method as for the chime. The limits will only be set by your imagination! You can now create your own beer jewelry .

If you are handy and have the right tools and materials, you can start making this type of necklace :
Otherwise, we also offer necklaces!

Bracelets
Same principle as for necklaces, except that you can wrap the entire wrist with just the capsules.
Rings
Once you've found the ring, you're free to decorate the capsule however you like! Remember to always use the outside of the capsule to stick it to the ring. Be careful to stick them together because we use our hands and fingers all the time and you'll quickly end up hanging your ring on something! 💍
If you want to save even more time (and cheat a little!), you can directly buy a ring with a capsule on it. Eeeeh yeah, we thought of it! Here's the beast which is available in gold or silver (click on the image to see them):


Earrings

Either you go the “roots” route by collecting scraps of metal from everywhere or you simplify your life by buying some jewelry supplies on Amazon for example.
I recommend you use fine tweezers because you'll be handling small objects. It's going to be a meticulous job that requires patience, but when you see the photo, you'll think the end result is really nice.
And magic as if by magic, just like the rings, we also thought of making beer-themed earrings ! You must be thinking that we are either geniuses or crazy, but in any case, here are our models in the shape of mugs or bottles (click on the image to see them):


Pincushion Capsules

Calling all seamstresses, here's a variation of the cushion that can be worn on your wrist when taking measurements for alterations! Take a piece of fabric and form a ball into which you can put either fabric or cotton. Once your bundle is ready, tie it as tightly as possible with string. Fill the inside of your capsule with glue and place the bundle upside down. Then, simply glue the ring to the capsule.
Crown of Capsules

Have you read the paragraph on decorating the edge of a mirror? Then you won't be disoriented! Start by finding your support, taking into account the weight of these dozens of capsules. We recommend using wood this time. If you have a jigsaw and a drill, you can create the shape you want by starting with a square or rectangular plate.
Use the same technique as for the capsule clock (compass or nail + string) to trace 2 circles on your support. For the outside, simply cut along your line. For the inside, start by drilling one or more holes along your line to insert the blade of your jigsaw. Then, simply follow your line to empty the inside.
For a cleaner finish, use 240-grit sandpaper to achieve a more uniform appearance and smooth out any “track errors” from the jigsaw.
To create a raised crown effect, glue your capsules on several layers, taking care to put less and less on each edge, ending with a final line in the middle. This will give the desired rounded effect.
Have you ever found a capsule under your couch when you try to lift it up to vacuum or sweep? The same goes for behind furniture and other items.
Oddly enough, we often find them scattered all over the place. What if we offered you the ultimate item that lets you both uncap your beers and collect the caps ?
Not bad, right? So here's our wall-mounted bottle cap collector :

Capsule Photo Frames

Well, there's no excuse of "oh yes, but I don't have the tools for it", etc...! You just need to either find an old ugly frame lying around somewhere or buy a cheap one made of raw wood.
If you want, you can repaint it before sticking your caps on it. And there you have it, a custom beer cap frame that you won't see anywhere else. We'll let you choose the photo, but don't overdo it, eh! 😆
Mini Capsule Candles

- For the scavengers: it's great if you can salvage candle scraps (yes, it's weird to use the word "quignon" for something other than bread, but I thought it could be fun!). If you have candlesticks, your candles can't burn down to the end, so you might as well use them. It also works with leftovers from other candles. Melt the wax in a saucepan, collect the wicks. Place the wicks in the capsules, dipping the ends in the hot wax to make them stick. Then pour the wax over them, and you're all set.
- For the lazy: buy paraffin and wicks from a home decor store and follow the same process!
Given the small capacity of a capsule, these candles will not last very long . Also, the metal will heat up quickly so be careful where you place them. On the other hand, they are particularly suitable for being placed in water or in a bath because they will float very well. Notice to amateurs! 😉
Custom Capsules Table

Have you seen that good old square coffee table from Ikea that probably sells for around €10? It's hard to have missed it since it's been around for so long, eh? Very practical and inexpensive, certainly, but highly impersonal...
Agreed? Then customize it! And it's even better if your tabletop is worn and worn because you're going to cover it.
Start by heading to your favorite hardware store to buy what you'll need: clear resin or epoxy and possibly a basic wooden frame the same size as your table. You can also buy a board or salvage one if you want to make the frame yourself.
Glue your frame directly onto your table, taking care not to let the edges overhang . However, the trick is to ensure there is no space between the frame and the table . You will either need to place something heavy on your frame or turn the table over so that it naturally presses against the frame.
Next, glue your capsules to your table. You can also pre-glue a poster, photos, wallpaper, or whatever you like to completely hide the top if it's damaged. Arrange them however you like, geometrically or in the shape of something. However, don't overlap them to maintain a uniform thickness.
Now you'll understand why we put so much emphasis on having a tightly glued frame. You're going to pour your pot of resin onto your capsules . until you reach the level of your frame. All you have to do now is wait for the resin to dry. You will have the most beautiful beer capsule table ever!
Tip: Before pouring the resin, prepare a sheet or towel to place over your table (without being in direct contact with it). Indeed, while the resin dries, a lot of volatile things could come to rest on the resin and you would end up with a hair or crumbs embedded. It's a shame to go to so much trouble only to have a result ruined by dust or something else, right? 😖
Capsule Brooches

Let's start with the pins you need to get. Some call them safety pins, safety pins, or even captive pins for the Swiss Normans. You see, I think of everyone. I'm nice, aren't I?! 😃
You can glue your capsule directly onto it. To make it more durable, you can also make two holes in it to pass the pin through. However, glue will also be necessary unless you want the capsule to be able to move and move along the pin.
Some students collect badges on a beret for example and this one should be a hit among the others! 😎
Capsule Birdhouse

There you will have understood that you have 2 solutions:
- Take the blue pill and go to a home decor or hardware store to buy a birdhouse.
- Take the red pill and start building your own birdhouse! All you need is a few nails and planks, a jigsaw, and, of course, some bottle caps.
In either case, I highly recommend purchasing some wood stain to paint your birdhouse . The stain will protect the wood from the elements (sun, rain, snow, etc.) and will also protect the capsules by coating them with a protective layer. And yes, they will rust over time otherwise...
You will need to apply two coats, respecting the drying times . This will also prevent you from having “magnificent” rust streaks on the roof of your birdhouse, unless you find it pretty, of course. Each to their own, after all!
A good tip about staining: ignore the manufacturer's recommendations that it will last 4 years, etc. Sun, rain, and cold will damage the wood a lot. Renew the 2 coats every year , or at worst, every 2 years. Given the size of a birdhouse, your pot will last you several years, and it doesn't take much time each time.
Capsule Magnets

Many of us have magnets on our refrigerators , right? Well, it's time to make your own! Pick up some magnets from a hardware store or collect some and stick them on the inside of your capsules.
After that, it's up to you to decide what you want to put in it, in the same way as for necklaces. Shells, pearls, photos, or even small objects, you're spoiled for choice . It's crazy what you can do with glue, you'll see!
If you have kids, they'll love doing this fun activity with you! 😊 It's also a great idea for a creative workshop for kids if you're hosting a birthday party or snack at home. Each child will leave with their own magnet(s) and their parents will thank you! Fridge magnets always work.
Mini Capsule Photo Frames

Are you one of those people who has a cork board at home? You know, the kind you have in the entryway, kitchen, or living room. You pin photos, grocery lists, sweet notes, your children's drawings, etc. on it.
And why not add mini photo frames ? It couldn't be simpler! Simply stick a pin on top of your capsule and stick a photo inside. And there you have it!
Just like magnets, these mini photo frames can be a nice gift idea for grandparents or friends.
For a little twist, you can also make pins with your bottle caps! It's very vintage, but it looks great on a denim jacket. Here are some examples of the pins we offer; just click on the image to see them:


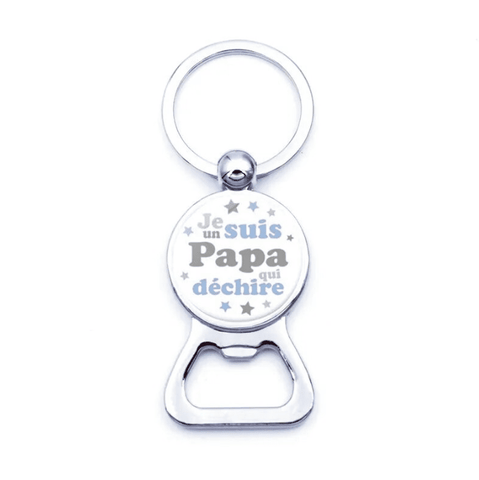
Capsule Keychains

This is a mix of the mini-frame technique and objects with chains. No need to repeat yourself on what you can put inside your capsules.
For the keychain and attachment, you should be able to get some in stores that have a craft section (Zodio, Truffaut, etc.). Otherwise, there's always good old uncle Amazon. All you have to do is pierce the top of your capsule to insert the last ring of the attachment chain.
Fishing Lures Capsules

Yes, you read that right, you can make lures with capsules! It's a bit of a cheat though, because you've already seen the picture! 😁
If you're a fishing enthusiast, you probably already have some equipment. Like any good angler, you know that what really attracts fish is the shiny appearance of the lure, which mimics the reflection of the sun on the scales of a prey.
A folded capsule will produce the same effect. Simply pierce it at both ends and you'll have a unique lure!
If you know any fishermen in your circle and you want to give them a "made in yourself" gift, all you have to do is find some lures and do the manipulation with your little hands. They will rightly appreciate that you think of them and especially that you are interested in their passion!
Mini Capsule Tarts

Have you seen how realistic these mini pies are? We'd love to eat one, wouldn't we? 😏 Well no, don't touch! It's a decorative object, period! 😠 😅
To make them, for example, simply fill your capsules with jam and place salt dough lattices on top. Bake them in the oven at 180°C for 10-15 minutes. Make sure everything is dry and dehydrated.
Then use clear polish to apply a protective layer. If you have nail polish, that will work just fine. You now have a set of decorative mini tarts!
The most popular variation is to stick a magnet under the jam. You'll get a magnet with a stunning effect! 😉
Capsule Jewelry Organizer

Here's a 100% girl tutorial! 😁 If you don't yet have a place or object to store your jewelry, this is where it's happening!
Take the lid of a shoebox, a piece of cardboard, or a piece of fabric to serve as a base. Glue your capsules to it and then paint the whole thing. That's it, you now have multiple storage spaces to store your rings, pendants, earrings, and more!
Recycle your capsules
So here's a small selection of things you can make yourself with your beer caps. I've tried to give you some ideas for recycling and repurposing materials whenever possible.
In fact, it is much more rewarding In my opinion, it's best to do everything on your own, when it's feasible of course. I hope you've enjoyed all these ideas, but this article isn't set in stone. Please note that if you have any other ideas, you can let me know and I can incorporate them if you wish! I'm open to any advice, whether positive or negative! 😇
Finally, I have an alternative solution if you have too many beer caps: use them as projectiles! Here is our beer cap launcher pistol bottle opener that will delight young and old alike! Let's have some frantic aperitif battles! 😜

Writing these blog articles takes me a lot of time for research, writing, images, etc. You have noticed, there are no unwanted advertising banners for insurance, credits or other but suddenly it does not bring me any source of income.😢
If you had the patience to read my article to the end, know that you can benefit from a 20% discount on your entire order by entering the code BLOG20 in your basket.
I'm reserving this code for my most loyal readers who discovered our site through the articles I lovingly post! FYI, the code cannot be combined with other discount codes because you can't overdo it, eh! 20% off doesn't leave us much room to spare, but at least I'm rewarding my readers.
To encourage and support me, don't hesitate to buy something from us! 😊
If, for example, you're looking for an original bottle opener, you'll definitely find what you're looking for among our models; we have more than fifty!
To discover all of our products, click on this link: Chopedebiere .
If you would like to read one of my other articles, I suggest you discover the origin of beer pong or the fascinating history of the Paris catacombs .
To see all my other blog posts, click on Blog De Chopedebiere.
2 comments


Julien de Chopedebiere
Bonjour Jean-Marie,
Je vous avais répondu par email mais pas via l’article, désolé !
Nous avons bien assez de capsules dans l’équipe, rassurez-vous. 😊
En revanche, vous pouvez passer par des sites de dons ou groupes Facebook pour donner votre excédent de capsules. Vous ferez certainement des heureux ! 😉
Merci beaucoup en tout cas d’avoir pensé à moi et je suis ravi de voir que mon article vous a intéressé !
Bien à vous
Julien
Jean-Marie BERNARD
Bonjour Julien,
Je possède beaucoup de capsules de bières en doubles, je fais la collection mais dans certaines j’en ai beaucoup trop en voyant ce que vous en faites, est-ce que vous en voulez
merci d’avance,
Jean-Marie BERNARD
Binche (Belgique)